TRANSCRIPT
Hello again, I’m David Reed with Reed & Ward, the makers of CCW Guardian, the premier smartphone app for CCW permit holders.
This is how to field strip and reassemble the Smith & Wesson M&P Bodyguard 380.
So, let’s start off by taking a look at what you all get in the box. Alright, you get a padded case and this case contains the weapon and the magazine in this little pouch. More about that later. You get a well illustrated owners manual that includes, you know, exactly how to field strip, maintain, site adjustments. Everything. You definitely want to keep this. If you ever lose your owners manual, you can contact Smith & Wesson on the Internet and you can get a free one. Obviously a warranty card that you want to fill out and send in. A piece of brass in a sealed envelope for those jurisdictions that require you to turn this in, if you haven’t moved from that area yet. And of course the obligatory padlock.
Alright, set this aside. Let’s take a look at this case. Now, I really like this case. It looks like the day-timer or something. Like I can carry this around and have a calendar in there or something. I don’t think people would really notice this, especially if I had, you know, other things with it. I don’t think people would notice it as a gun case. Except that Smith & Wesson had to go and put their logo on the outside. So, you know, you might just have to carry it like so, but I think it’s a great option for women who are going to carry a weapon say in a purse. They get this. And I get that Smith & Wesson designed this for the CCW market which is what this bodyguard is perfectly suited for.
Okay, so let’s go ahead and field strip, I’ll set that aside. The Smith & Wesson Bodyguard M&P in 380. Step one, we’re going to clear lock and show safe. So, I’m going to lock it to the rear using the slide stop. Visually and physically inspect the chamber. There’s no ammunition anywhere in the area. The weapon is safe and ready to be field stripped.
Okay, and disassembled. So, we’re actually going to start disconfiguration. You don’t have to pull the trigger or anything, the weapon is locked to the rear using the slide stop and it is clear and safe. Right here is the disassembly lever. It’s the foremost lever on the front of the weapon, just above the trigger. And what we’re going to do is we’re going to rotate this lever from the 3 down to the 6 o’clock position. It’s going to kind of fight you on this, but it’s okay. Once you get it down to this 6 o’clock position, you’re going to pull it out. So we have to work it a little bit. Back and forth. Pull it out, and comes out pretty easily right there. Alright, next I’m going to take that by pulling back on the slide. Now, I want you to watch the slide stop drop out of the way. See it? And I’m just going to pull that slide right off of the frame since you get the situation right here.
Okay. Now I’m going to take the recoil spring and recoil spring guide rod out of the frame and the barrel out. Now this is where we have to have a note of caution. The spring is under a little bit of pressure. So, I always want to rotate that slide to where the barrel’s pointed back towards me. It’s disassembly there’s no safety concern right here, but when I pull this spring off, if I would accidentally let go of it the spring’s going to shoot in this direction. It’s not going to fly back towards me or my eyes. So, always wear eye protection whenever you’re disassembling a semiautomatic pistol and be careful about which way you’re pointing that spring. If you’re watching this on the Internet don’t point this toward your computer screen. Okay so I’m going to pull back on the spring using my index finger. And then release that pressure slowly and take it off.
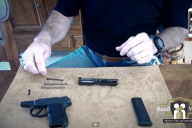
Now the barrel comes out by pushing forward on the barrel, tilting it up and rotating it backwards out of the slide. I can also take that recoil spring off of the recoil spring guide and this is a fully field stripped Smith & Wesson M&P Bodyguard 380. This is as far as you need to take this weapon down. Once you’ve cleaned the weapon, you’re ready to reassemble it.
So, let’s go over reassembly real quick. I’m going to reverse the procedure by starting up by putting the barrel in and I’m going to rotate it like so. In, press down, and then pull back. Okay, the barrel is in there. Spring goes on to the guide rod and the location that I’m looking for is right here. We use the guide right to kind of point at it. It’s right here. This is this little indentation at the, on one of the barrel lugs and that’s where the head of this spring is going to go. It’s where the guide rod is going to go. So again, with the barrel pointing back towards me, insert the spring and you can kind of see what I’m doing. You see this little hole right here? That’s where I’m putting this spring and then I’m compressing the spring, again with it facing away from me, and putting the head of that stainless guide rod into that indentation.
So, at the end of the day this is what it should look like. It should look level like so and that’s that. Now, there’s one little trick to these M&P Bodyguards and that has to do with the hammer right here. Now, what we’ll do is a test, I’m going to pull back and forth on the trigger like so. The trigger bar is working right here, but the hammer is not moving. That’s good. You’re ready to reassemble the weapon. Everything is as it should be. However, let me stage this for you, if I pull the trigger and the hammer moves, see it moving, the weapon is not ready to be reassembled. So don’t reassemble it yet. What you’ve got to do is put your thumb of your firing hand on that hammer and pull back on it and pull the trigger all the way and then let that hammer go to its over travel position. And see what I’ve done is I have taken the hammer out of action. It’s not moving. Trigger bar is moving. Hammer is not. Trigger’s moving freely. So now I’m good. I’m ready to reassemble this weapon.
So here’s what we’re going to do. We’re going to put the slide back onto the frame. Okay? So all I have to do is line these slots up with these notches, with these rails rather and then when I pull it back, insert the slide stop and lock the weapon all the way to the rear. Now, as you’ll notice that sometimes the barrel moves backwards, take your fingers and push this barrel, either by pushing on the chamber and or pulling on the barrel in, to the barrel is fully all the way out before you put this takedown lever back in. I’m going to start with the lever, facing down in the 6 o’clock, and I’m going to work it back up to 3 o’clock, right here. Okay. So push it in there, making sure the barrel is all the way forward. Okay, the lever is right there, rotated up to its 3 o’clock position and then push it all the way in. So it doesn’t quite go all the way in but until you press it in and making sure the barrel is all the way forward. Now again, making sure that the slide stop drops out of the way to pull back on the slide as you just saw, push it all the way forward. If for some reason the slide doesn’t go all the way forward, it’s that trigger issue. You need to take a slide back off and reset that trigger. But you can check the function. Everything seems to work. The hammer is working perfectly. The weapon locks up. Good. Slide goes forward, hammer works. Manual safety on. Both slide and trigger are locked. The weapon is now fully reassembled and that’s how you do the M&P Bodyguard 380.


4 Comments
Another great video. Informative and very well presented.
What a informaton of un-ambiguity and prederveness of
precious familiarity regarding unpredictewd feelings.
Look at my hmepage … https://www.Evernote.com/shard/s629/sh/a7f56037-f0d4-159e-6731-156fae4006d1/d797529c63ac857d2be1fad913a45284
Wow! At last I got a blog from where I can genuinely obtain helpful
information regarding my study and knowledge.
my wweb site; Timmy
It’s truly very complicated in this active life to listen news on Television, therefore I jst use internet for that purpose, and taake the most up-to-date news.
Here iss my page … http://weeklywars.de/viewtopic.php?f=6&t=10061